Use Pygments to highlight code syntax in Jekyll
This post is a follow-up of this post and this post which describe how to use Jekyll to generate a static website. The particular topic that the current post is addressing is syntax hightlighting with pygments. It is widely inspired by this post, which saved me a couple of hours to set up pygments properly, and is designed to be used on Ubuntu 14.04 LTS.
-
the first step consists in installing Pygments and in generating a CSS file from pygments:
sudo apt-get install python-pygments
the corresponding CSS file is then generated using:
-
in the second step, we set-up jekyll installation to use pygments. First, edit the file
_config.ymland add the following linehighlighter: pygments
then, move the previously generated filepygments.cssinto a subdirectory of your jekyll installation, sayassets/cssand add the following line in the header of your default layout (this is the file_layouts/default.htmlin this post):
-
you can now use Pygments using liquid tags. For instance, the R code
data("iris")
plot(iris$Sepal.Length ~ iris$Sepal.Width)
will give the following (not very spectacular) syntax hightlighting: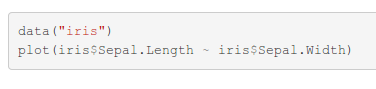 if set between liquid tags for hightlighting:
The list of available languages and names for these languages can be found in your Pygments installationdata("iris") plot(iris$Sepal.Length ~ iris$Sepal.Width)/var/lib/gems/1.9.1/gems/pygments.rb-0.6.0/vendor/pygments-main/pygments/lexers.

